Choosing track is one of the few decisions on a layout you cannot easily walk back. Once ballast is glued, wiring is soldered in and scenery is built up around the rails, swapping systems means tearing out work you have already finished. Getting it right before you lay a single piece of track saves you money and saves you from redoing a baseboard you were happy with.
Peco and Hornby are the two systems most beginners in the UK weigh up, and both are good products with different strengths. This comparison looks at rail profile, points, realism, electrical reliability and cost, so you can match a system to the layout you are actually planning rather than just picking whichever one is cheaper at the till.
Why Your Track Choice Shapes the Whole Layout
Track is not just the surface trains run on. It sets the minimum curve radius you can use, which decides what locomotives and rolling stock will run reliably. It also determines how your layout looks at ground level, since rail height and sleeper spacing are two of the most visible details on any model railway.
Mixing systems or switching halfway through a build is possible, but it is easier to plan for one system from the start and bring in the other only where it genuinely helps. If you’re still working out curves, gradients and board shape, it’s worth reading our guide on planning your model railway layout before you commit to a track system, since the plan you draw up will affect which track suits you.
Rail Profile Explained: Code 100 vs Code 75 and Why It Matters
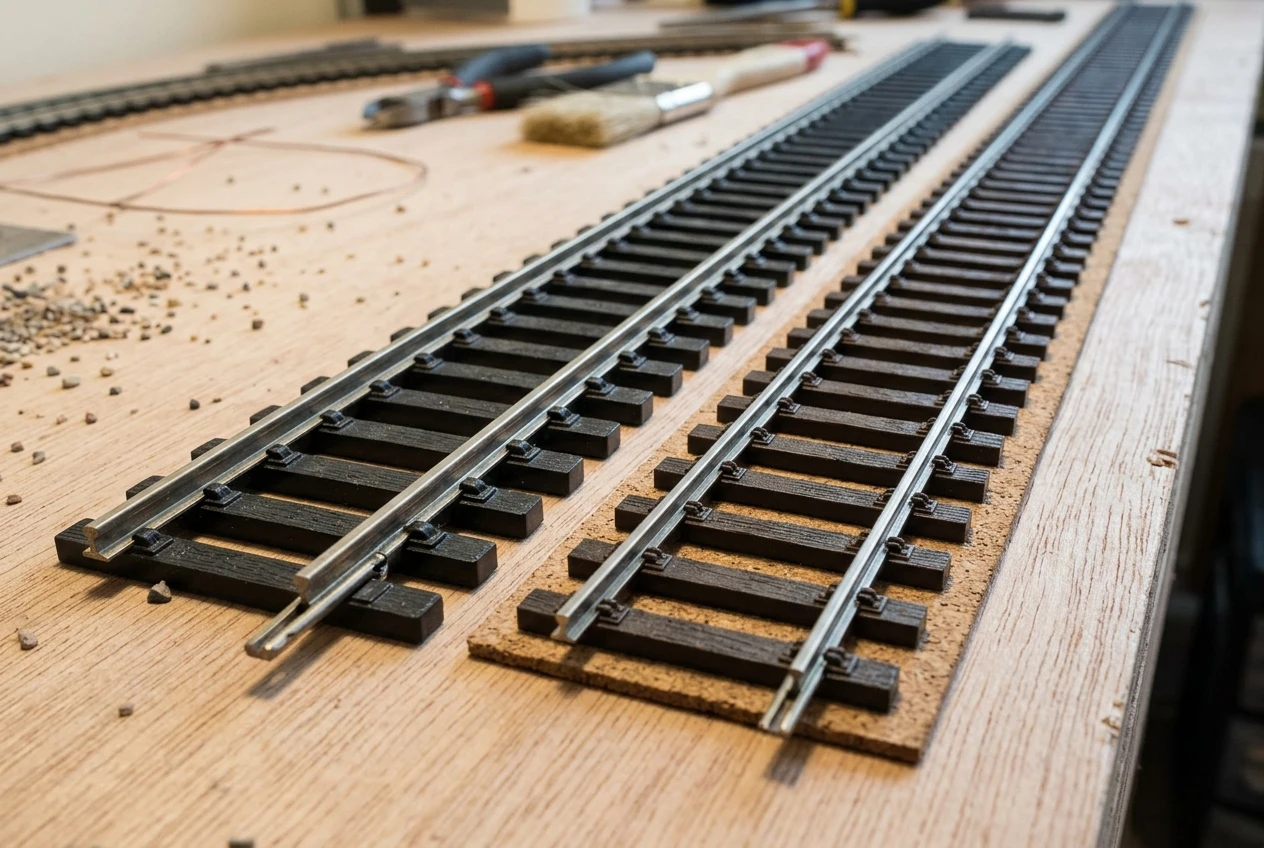
Rail profile is measured in thousandths of an inch and tells you how tall the rail is above the sleeper. Hornby track is Code 100, meaning the rail stands 100 thousandths of an inch tall. Peco produces both Code 100, sold as Setrack, and Code 75, sold as Streamline, which has a noticeably lower, finer-looking rail.
For beginners, Code 100 is the more forgiving choice. The taller rail is more tolerant of minor unevenness in the baseboard, and wheel flanges on older or budget rolling stock are often deep enough that they can catch on the finer Code 75 rail or any points that aren’t properly aligned. If you are starting out with a basic train set and standard Hornby or Bachmann stock, Code 100 in either the Hornby or Peco Setrack range will give you fewer running problems while you learn to lay and wire track.
Code 75 looks better. The lower rail profile is closer to scale and makes a real visual difference once ballast and weathering are added. It’s a natural step up once you’re confident with your wheel standards and want a layout that looks more like the real thing in photographs. If realism matters more to you than ease of setup, Peco’s Code 75 Streamline is worth the extra care it demands.
Points and Turnouts: Peco Setrack and Streamline vs Hornby’s System
Points are where the differences between these systems become most obvious, because a point has to hold its shape, switch reliably and keep electrical contact all at once.
Hornby points work well within a Hornby-only layout and are straightforward to wire, particularly for a beginner following a set track plan. They use a solid, chunky mechanism that beginners generally find easy to understand and operate manually or with Hornby’s own point motors.
Peco’s Streamline points, especially the Electrofrog type, are built with the electrical frog powered rather than isolated, which gives slower, smaller locomotives a more reliable supply of current through the point itself. This matters more than it sounds: a dead frog section is one of the more common causes of a model stalling exactly where you need it not to, at a junction on a show-piece section of layout. Peco’s Insulfrog points are simpler to wire and closer in behaviour to Hornby’s system, so they’re a reasonable middle ground if you want Peco’s finer look without taking on Electrofrog wiring straight away.
If you are running DCC, this is a section worth paying attention to, and it connects directly to the wiring choices covered in our guide to DCC model railway wiring, since point wiring and DCC bus wiring are decisions made together, not separately.
Ballast, Sleepers and Visual Realism Side by Side
Hornby Code 100 track comes with a grey plastic ballast base moulded into the track itself. It looks reasonable out of the box and is fine for a first layout, a train set under the Christmas tree, or a layout you want running quickly without much scenic work.
Peco Setrack shares a similar moulded look to Hornby, since both are Code 100 track aimed at the same beginner market. Peco Streamline, in Code 75, has finer, more closely scaled sleepers and a flatter, less toylike base that takes real ballast and weathering more convincingly. Once you have ballasted and painted Code 75 track, it is considerably harder to tell apart from a kit-built equivalent, whereas Code 100 track tends to still read as a model even after weathering, mostly because of the taller rail.
If realism is a priority for your layout, it is worth looking at how track, ballast and scenery work together rather than judging the track alone. Our piece on model railway scenery materials for beginners covers the ballast, glue and groundcover you will need regardless of which track system you choose.
Running Reliability: Electrical Contacts and DCC Friendliness
Electrical reliability is where a lot of beginners run into frustration, usually without realising the track itself is the cause. Hornby track uses fishplates to join sections, and these can work loose over time or after a layout is packed away and rebuilt repeatedly, leading to dead sections or flickering lighting.
Peco Streamline uses a similar fishplate joining system but tends to hold a tighter connection, particularly once track is pinned down and ballasted, which locks the joints in place. Electrofrog points, as mentioned above, give DCC users an advantage because the frog carries current rather than relying on wheel contact alone, which reduces stalling on slow-speed shunting moves.
Whichever system you choose, soldering a dropper wire to the underside of the rail every few sections, rather than relying purely on fishplates to carry current round the whole layout, makes a bigger difference to reliability than the choice of brand does on its own. This is worth doing even on a straightforward oval, and it is covered in more depth in our guide to DCC model railway wiring.
Price Per Yard: Starter Oval vs an Expanding Layout
For a simple starter oval, Hornby and Peco Setrack are priced closely enough that cost is rarely the deciding factor. Both are sold in similar pack formats aimed at beginners, and a basic oval with a couple of points will cost roughly the same whichever you choose.
The price gap tends to widen as a layout grows. Peco Streamline in Code 75 generally costs more per piece than Code 100 track, and Electrofrog points cost more again than Insulfrog or Hornby equivalents, reflecting the more complex moulding and powered frog. If you are planning a modest layout that will stay a simple oval or figure of eight, the price difference is unlikely to matter much. If you are planning something that will expand over several years, with sidings, a fiddle yard and multiple points, the cumulative cost of Code 75 Streamline is worth budgeting for in advance rather than discovering it halfway through a build.
It’s worth pricing out your actual track plan, point count included, before buying anything, since points are usually the most expensive single items on a layout and the ones where the Peco and Hornby price gap is most visible.
Mixing Peco and Hornby on the Same Baseboard
Mixing track mid-layout is common, and it can work, but it needs to be done with care rather than assumed to be plug and play. Hornby Code 100 and Peco Setrack Code 100 share a rail height, which means they can be joined with standard fishplates and will run together without a step at the joint. This is the easiest and safest mixing scenario, and it’s a reasonable way to extend an existing Hornby layout using Peco Setrack points if you want Peco’s Electrofrog wiring advantages without replacing all your track.
Mixing Code 100 with Code 75 is more awkward. The rail heights are different, so a joint between them needs a rail joiner that steps down, or a small packing piece under the lower rail, to avoid a lip that can derail stock running over it at speed. It’s doable on a transition between a visible scenic section in Code 75 and a hidden fiddle yard in Code 100, where the join is out of sight, but it’s not something to plan into a prominent, visible stretch of track.
As a general rule, keep Code 100 and Code 75 on separate, clearly defined sections of the layout, and treat any transition point as a deliberate piece of trackwork, built carefully, rather than an afterthought.
Matching Track to Your Layout Plan
There is no single correct answer between Peco and Hornby. The right choice depends on what you are building and how far you plan to take it.
A first layout, a train set layout, or anything built mainly to get trains running quickly and reliably is well served by Hornby Code 100 or Peco Setrack, which are close enough in price, look and ease of use that either is a sound choice. A layout built with realism and long-term expansion in mind, particularly one running on DCC with slow-speed shunting, benefits from Peco Streamline in Code 75 with Electrofrog points, despite the higher cost and the extra care points demand during installation.
Before buying any track, it’s worth finalising your layout plan first, since the curves, point count and board size you settle on will tell you how much track you need and where the Peco versus Hornby decision actually matters most.
If you’ve weighed this up and Hornby’s track suits the layout you’re planning, it’s worth browsing Hornby’s current track range to see what’s available for your plan. This site earns a commission on qualifying purchases made through links like this, as set out in our affiliate disclosure.